
Making your own ear wires
- Jun 28, 2017
- 4 min read
One of the things I claim about the jewelry that I make is that it is handmade. I kind of take this to an extreme and try to make as much of each piece as handmade as I can make it. I do however, draw the line at making some of the sterling Bali style spacers or round sterling beads. I also got a bit tired of paying anywhere from $2 - $4 per manufactured pair of sterling ear wires depending on the style. After a bit of research, I decided to try to make my own and I’ve never looked back.

My signature pebble earrings featuring the hand made sterling silver ear wires that I make.
Materials/equipment needed:
- propane torch (self igniting is easier, my first one is just a regular one from the hardware store found in the soldering/plumbing section). I've subsequently upgraded and bought a Blazer butane torch which I'm able to hold in the palm of my hand and it is easier to use.
- dead soft sterling wire in 21 0r 20 gauge ( I get mine from https://www.riogrande.com). If you don’t want to deal with fire scale which is caused by the flame torch, purchase pure silver in these gauges and you will just get the beading effect.

Sterling silver dead soft wire in 20 gauge.
- pliers (flush cutters, round nosed pliers)
- mandrel ( I use a short dowel rod, but people use anything that has a nice round shape that will be good for their specific ear wire shape that they are aiming at making.
- ball-peen hammer and bench block.
- deburring tool
- ruler
- heat-proof dish (Pyrex, Corningware) salt and vinegar (this is an eco friendly pickle to get rid of your fire scale. Plastic tongs or spoon.

Here are the tools that you need for making ear wires. (From top left and clockwise) wire flush cutters, mandrel (dowel), ruler, ball peen hammer, propane torch,round nosed pliers and steel bench block in the middle.
Process:
-Firstly, bend out a desired ear wire shape that you are aiming for and cut it. Straighten it out and measure it. Mark on your ruler with a pen or Sharpie the length of the intended ear wire. This will help with quick snipping of lengths as you create each ear wire.
- Light your butane torch and hold the sterling wire in the flame, you will see it start to melt and basically bead up. Hold the wire so that a balanced and not lop-sided bead forms.

Torch with sterling silver wire melting into beaded shape. This one is lop sided as it's hard to take a photo and do this type of work.
- Allow it to cool slightly, measure it against your ruler demarcation and snip with your flush cutters. It will look like a head pin at this stage. (Hey, you never thought you’d learn two skills in this blog!!)
So many future ear wires.
- Once you’ve made as many as you need, turn off your butane torch and head to where you have some electricity.
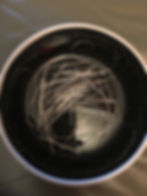
-If you’ve used pure silver for this project you can skip this process, if you haven’t and you’ve used dead soft sterling silver, your “headpins” or soon to be ear wires, will have some fire scale on them. Pour ½ cup white vinegar into your glass container, heat it up in the microwave for 30 seconds and stir in ½ tsp salt. Place all your future ear wires in this solution. (There are commercially available pickle mixes for jewelry making, but I prefer this kitchen version as I know it’s safe.) Because you are using this as a one time use, the microwave works, if you were using this for an extended period for multiple items that had fire scale keeping it on a warmer or in a small crockpot (used only for this purpose) would be a better way to keep it warm. You will leave them for about 10 mins to clean up. Remove from pickle with plastic spoon or tongs if you want to reuse the pickle. Using other metal except copper tongs will contaminate it.

Future ear wires in vinegar and salt pickle (I prefer to not use commercial pickle as I go for as many non toxic ingredients as I can when making jewelry)
- Rinse the beaded future ear wires in water.
- With your mandrel shape the ear wire and fine tune the design with your round nosed pliers.

Straight head pin and a couple of bent ear wires that are now ready for work hardening with the hammer
- If you used dead soft sterling wire or pure silver wire, you will need to work harden each ear wire. I do this with my bench block and my ball peen hammer. I tap the top of the hook gently with the hammer on the bench block and a little towards the tail end of each one.

Ball peen hammer with steel bench block and completed sterling ear wire.
- The only thing left to do to your ear wires now is to use a cup shaped deburring tool, which you swirl around getting rid of any sharp edges.
To give you an idea of your savings and time involved, I had 15 feet of 20 gauge pure silver wire which cost me $19 from RioGrande.com and I made 66 ear wires. It took me about 1 ½ hours to make 33 pairs. The price per pair calculates out to 60 cents a pair!!! Who doesn't love this savings!!! Normally these types of ear wires sell for $2 - $5 per pair depending on their shape, and you have it within your own creativity to make whatever shape ear wire your heart desires.
I hope this blog post has given you the courage to make your own ear wires. It truly is not hard. Take a look at my other blog on making jump rings. I often go live on Instagram and show my work in process especially silversmithing and metalsmithing. You can follow me on Instagram, I'm @andiclarkejewelry .
If you've enjoyed this post take a look at a couple of my jewelry making blog posts like:
- making jump rings
- making resin pendants
- torch firing PMC (precious metal clay)


