
Working with PMC (precious metal clay)
- Mar 3, 2021
- 10 min read

Perhaps you've followed me for a while and know that I make jewelry. You may also know that I also tend to like trying new things and precious metal clay, or PMC, is one of the jewelry making techniques that I've been curious about for years, and I really mean years.
If you are not a jewelry maker, you may just want to read along anyway to see all the steps that are involved in making just one of these items of jewelry that I feature permanently for sale on my website. (There are links to these products on my website with some of the photos.) If perhaps you do make jewelry of different types, I am going to share tips in this blog post that may be enough to get you interested in working with this incredible medium. I will provide links to products and I only recommend products that I have used.

PMC earrings created and based off a baby succulent plant
PMC clay is a precious metal in an organic clay material. It's actually fine silver or fine gold in a clay binder. I have no experience with gold PMC and all my tips in this blog post are based on working with silver precious metal clay.
Being a clay, it operates like other clay (I'm basing this on my experience with clay from my fine arts classes). There is one major difference though, and that is cost. Silver clay costs around $2.20 for half a gram, so mistakes are pretty expensive. It's also for this reason that if you buy an item of precious metal clay jewelry, that it is priced based on this..
In this blog post I will only be talking of PMC3 clay and Art Clay Silver which are the only types of this clay that can be torch fired. The others require a kiln and I don't have space for a kiln, even a small one.
Tools/equipment you'll need:
- roller or piece of PVC pipe about 6 inches or 15 centimeters long.
- olive oil
- ceramic tiles
- hot plate or hair dryer (If you get impatient for the drying time)
- sand paper in fine grit (400 or up), emery boards also work
- baby wipes
- parchment paper (like for baking cookies)
- pack of playing cards
- pyrex dish with water (for quenching hot things)
- needle nosed pliers
- butane fuel
- thin diameter plastic straws or cut and filed off metal nail for making holes for pendants or earrings.
- steel burnisher/ filed steel nail/ back of spoon
- Dremel 3000 rotary tool
- Bench pin or work bench area. (I like this one because it's smaller and the clamp allows it to be removed and stored when I'm not using it.)
- PMC 3 silver clay (this is important because other clays cannot be torch fired)
- Art Clay Silver (I've only recently tried this brand of PMC and I was very impressed with it. All of this brand seems to be able to be torch fired and since the price of silver went up in 2020, it's more reasonably priced than PMC3)
All items with links are through Riogrande.com which is my main source for all jewelry supplies. I get no commission for recommending them, they are just an excellent company to work with and order from. The exception to this is the Art Clay Silver which RioGrande does not stock, so I've provided an Amazon link which is where I've purchased this PMC from. Items without links can be purchased through your hardware store or local craft/art shop.
Book Recommendation
I read quite a few books on working with precious metal clay and this was undoubtedly the best out of all of them.
The Process:
I'll describe a couple of the processes that I use when creating things with PMC3. The first is the simplest. I have a mold with sand dollar shapes for both earrings and pendants that I use to create this type of jewelry.

These are my silver Pacific sand dollar and fresh water pearl earrings.
When using molds of any type always spray the inside with a cooking spray. I use canola cooking oil spray from Trader Joe's. It also helps to coat your hands in olive oil as the PMC clay is incredibly sticky.
Pinch off a piece of clay and press the clay into the mold and then pop it out carefully and place it onto one of the small ceramic tiles. If it needs a hole, make your hole at this stage, For the earrings I use a nail that I've cut off the end of and I wiggle it around to make the hole. For the pendant, I use a small diameter plastic drinking straw.
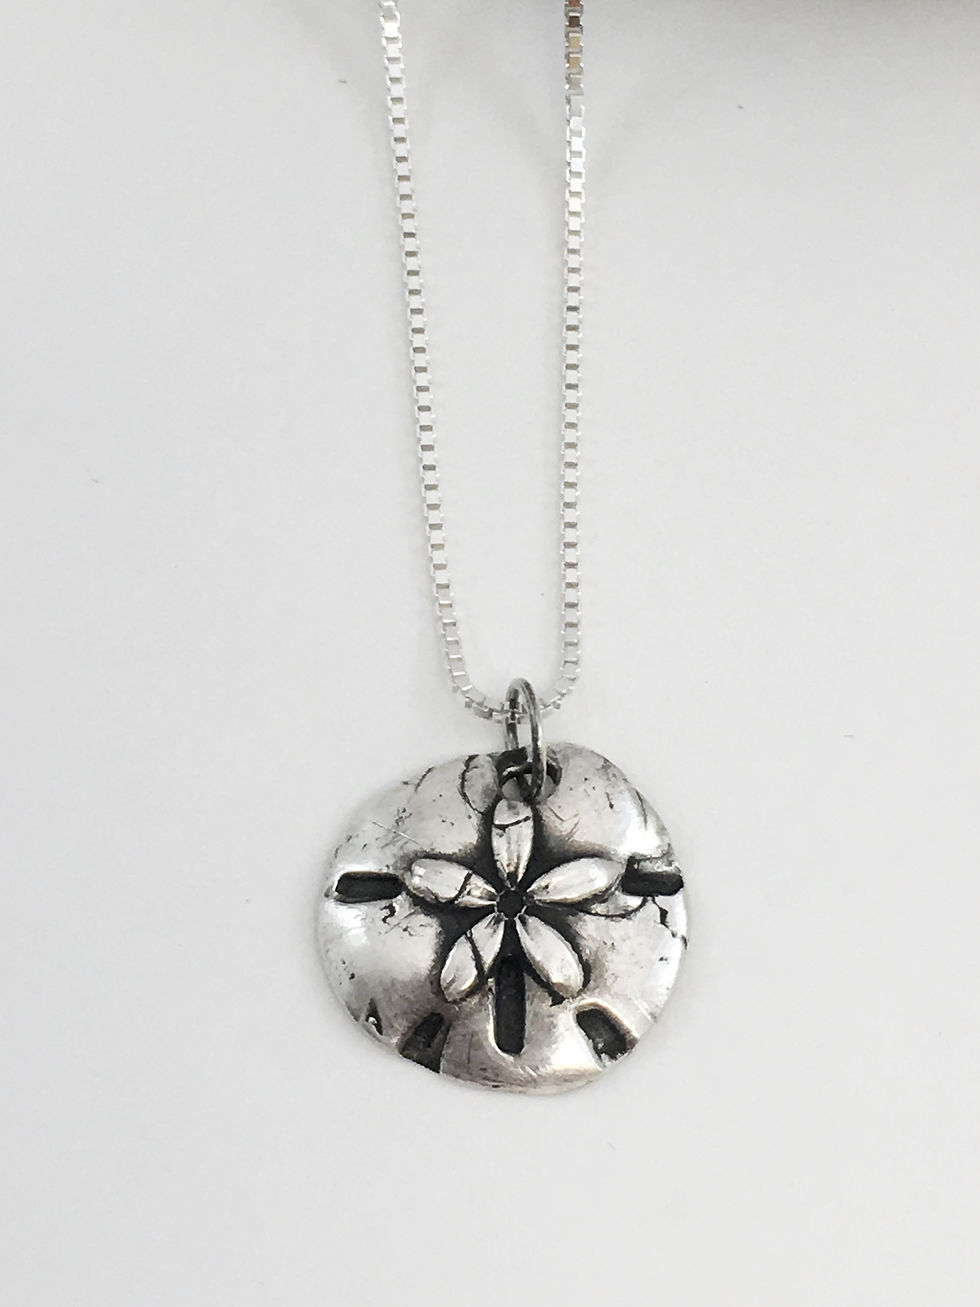
This is the finished silver sand dollar pendant after it has had the Liver of Sulfur patina treatment.
You will now allow your molded items to dry thoroughly on the ceramic tile. I have a warming plate on my stove top that has a nice low temperature for doing this on and my pieces are generally fully dry in a couple of hours. The ceramic tile doesn't mind the temperatures either.
When the pieces are dry, you are now ready to do a bit of sanding or cleaning up of them and getting any rough edges off. Believe me it's easier to do it now than when it becomes metal!! You can do this a few ways; with some sand paper, an emery board or even gently wiping with baby wipes. Bear in mind if you do the baby wipes, you'll have to allow the pieces to dry again before firing and you'll need to be careful not to wipe off the details that will make your piece interesting to look at.

This is a great before and after photo which also shows how much the clay shrinks after firing. Also shown is the sand paper that I like using, usually 400 grit and above. Also seen here is an oval shaped sage leaf pendant that I have on my website.
Because I have a tendency to do production runs to make things more time efficient, I quite often am making a few different products at once, such as sand dollar jewelry and my leaf or flower imprint jewelry too.

Fern imprint in this bar style pendant. Note the rounded edges and corners that I achieved by sanding them. when it was dry clay.
If you are making flat items and impressing designs on them, the process of working with the clay is slightly different. Once again make sure your hands are well oiled with olive oil. I do need to mention that PMC clays dry out quickly so in between each item you are working on, close it up in its plastic protector.
With the playing cards and on top of some parchment paper, stack 4 or 5 cards on top of each other on and have two stacks of cards. You will be using these as rolling guides to get a uniform thickness. In precious metal clay circles or on online tutorials or in books, if you see 4pc it means 4 playing cards thick. There are rolling guides available for purchase, but we had a pack or three of playing cards in our home, and so I used them. If I'm using a leaf that is quite thick (cedar leaf), I use 5 pc for the first rolling and for a sage leaf I use 4 pc. The parchment paper is non stick and helps you lift the wet clay shape up easily.

PMC3 Clay is perfect for being torch fired and it even comes in an envelope that can be sealed. Pictured here too are the playing cards used for getting uniform thickness.

I recently tried this Art Clay Silver PMC clay after using PMC3 for 4 years. I opted for it because I needed a clay that could be torch fired and I was also pleased to find that it was more reasonably priced than PMC3.
Coat your roller with olive oil and then roll your small piece of PMC between the rollers and on some parchment paper. Take your leaf or semi pressed lavender bloom and position it on the clay. Roll over it gently to imprint the leaf or bloom into the pendant. Cut your pendant shape, I use a straight knife or oval shaped cutter for the sage leaf. Knead any left over pieces back into the original piece of PMC3 clay and wrap it well in plastic if you are complete and seal it back in its ziploc envelope.

PMC clay pendants and earrings being dried on a tile on my stove top warmer plate. Not much shrinkage has happened yet.
Place the piece gently onto a ceramic tile and use straw or cut of nail to create its hanging circle. Allow to dry on the stove warmer or at room temperature. I've heard cup warmers can also be used for this part.
Once these pieces are dry, sand any rough edges that you don't want on the finished jewelry. I like creating rounded edges instead of having square sharp edges, especially on rectangular pendants.
You are now ready to start firing your PMC3 pieces. Other PMC clays can be fired in a kiln, but I don't have one, so that's why I opt for torch firing my PMC3 or Art Clay Silver with my Blazer butane torch.
Set your kiln brick up on a fire proof surface such as a baking tray and make sure your butane torch has been filled. Also fill your pyrex/corningware dish with water and place it near where you will be working.

PMC3 clay pieces ready for firing
When you torch fire your pieces you are going to concentrate on them one at a time. The first one will take a bit longer as the fire brick will be absorbing some of the heat. Focus your flame on one of the items and move it over the piece. Don't panic when it catches flame, this is called sintering and it's when the organic binding material burns away. The sintering only lasts about 10 seconds anyway.
As the piece is being fired, it will get a light orange glow to show that it is getting quite hot. Watch it carefully and as soon as you see it get liquid looking, take your flame off it. If you don't, you run the risk of the details becoming too melted and it will be time to toss that item. Pick up that piece with pliers and pop it into the water to quench and cool it. Move on to firing your next piece which should go quicker as the firebrick and surrounding pieces of PMC clay will have absorbed some of the heat. If you want to watch an excellent video of the firing process with well known PMC instructor Jill Erickson, head here.

PMC3 pieces that have been fired - earrings and pendants in this batch.
Once your pieces are cool you will notice that they look kind of white looking. You will now need to brush them with your brass brush to get rid of this white powder residue and do some burnishing. The process of working the piece and burnishing it now will work harden it. Without this work hardening, your piece will get easily scratched. This is not usually a problem for earrings or pendants, but it could be if you were using them for rings.

In my hand is a burnishing tool which I use to polish and rub against the silver sand dollar, highlighting areas of it by making them shiny.
Once the burnishing is complete if any of the items are to be a pendant, attach jump rings to them or solder on bails. You are now ready for your oxidizing patina. Mix up your liver of sulfur solution in a plastic bowl and pop your pieces of jewelry into it. Make sure you do this in a well ventilated area as it really stinks of rotten eggs. It will make the pieces black which will get into the crevices and areas of detail.

It's crazy to think that this yellow stinky stuff will make your pieces black, but it does.

Here you have the blackened and oxidized pieces and they don't look very pretty. This is why they need to be polished.
You can do some provisional cleaning and polishing with a very fine steel wool (US grade 0000) as a first step (see video below). This is when you connect up your 3M radial brushes into your Dremel or Flex shaft and allow it do do all the polishing.

As you will see from this photo this is not the same sage leaf pendant as the one that was being handcrafted above. This is one of the really unique features of PMC. Quite often no two pieces turn out exactly the same. The rolling and forming, firing, polishing and patina process is what makes each one unique. I of course use different leaves each time from our garden too which also makes them unique, creating one of a kind pieces of wearable art.

Here is a completed earring with some leaves in process on some parchment paper. Once your leaves are dry, do some very delicate sanding of any sharp edges after you've peeled the leaf away. Fire each leaf as you would normally do (I did torch fire mine and it was quicker than usual, due to how thin the pieces were) Complete up the burnishing, polishing and patina as you normally would.

I love how this Hawthorne leaf pendant turned out, don't you too?
I've ended up using this technique on quite a few different Pacific Northwest leaves as I fell in love with how authentic the leaves looked, especially after they had the patina process. You can find what's available for purchase in my web shop if you use the words "leaf pendant" or "leaf earrings" in the search bar on any page of my website.
if you are ever traveling in the Pacific Northwest near Olympia, Seattle and Portland, I'd encourage you to check when I'll be at The Olympia Farmers Market where you can see an array of my precious metal clay botanical and ocean inspired jewelry at my booth. if you follow me on Instagram, I usually post when I'm planning on attending the Market. And if Instagram is not your jam, you can find me on Facebook too.
Let me know in the comments below if you enjoyed the behind the scenes photos of what goes into making a piece of PMC jewelry. If you are a fellow jewelry maker and you have enjoyed this post, make sure you check some of my other jewelry making blog posts on how to make jump rings, ear wires and resin pendants.


Comments